In The Many Reflections of Miss Jane Deming, Jane’s teacher, Miss Bradley, gives her a small handmade book. Later, Jane makes one of her own to record her thoughts. You can make one, too! Here’s how.
You will need:
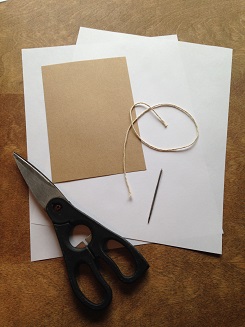
* One piece of heavy paper for the cover (cut to 4-1/2” x 6-1/2”)
* Two pieces of plain paper (like printer paper) for the pages
* Scissors or a cutting blade
* 15” or so of string, ribbon, or yarn
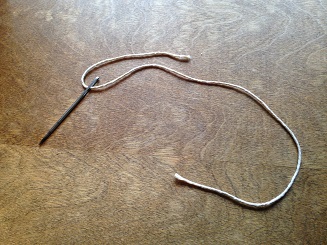
* A thick needle with a big eye
Steps:
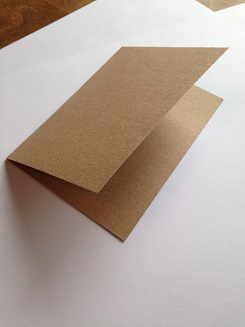
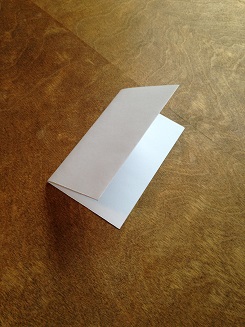
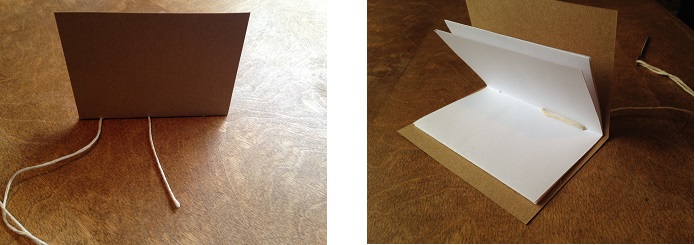
1) Fold your heavy paper in half and set aside.
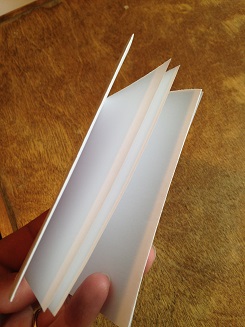
2) Fold each of your pieces of plain paper in half the long way. Cut them so you have four long, skinny halves. Cut carefully – these will be your pages.

3) Fold each half in half the short way, then in half again.
4) Each set should look like a tiny book already!
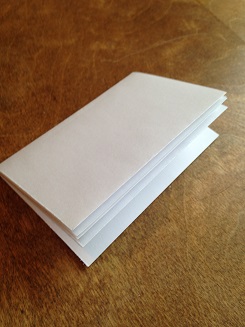
5) When you’re done, you should have four folded sets of pages. Nest your small sets of pages one inside the other. If you alternate the folded edges with the open edges, the sets will fit together more evenly. (Don’t cut the folds apart now! Keeping the sets folded helps them stay together better.)
Note: You can use all four sets or just three. The smaller number of sets of pages you use, the easier it will be to stitch the binding.
6) Tap your pages on a hard surface to make sure they’re all even on the top and bottom. They may not be even along the sides. That’s okay! Jane’s book probably wasn’t either. 🙂
7) Fit the pages into the heavy paper so they’re centered.
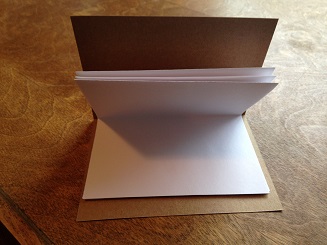
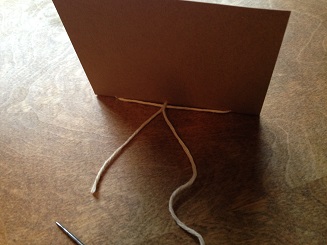
8) Place your book on a hard surface – make sure it’s a surface it’s okay to mark up. If you can’t mark up the surface, place several sheets of newspaper or cardboard down to protect it.
9) Use your needle to poke holes at the top, middle, and bottom of the book. Be sure to hold the pages tightly in place as you do so – this keeps the holes aligned and will make stitching easier. Push hard and wiggle the needle so it goes all the way through the pages and the cover and out the other side.

10) Lay your book *carefully* aside (or have a friend hold it for you) and thread your needle. Pull one end of the thread through just enough so it doesn’t come unthreaded.
12) Now you’re ready to stitch! Starting from the *outside* of your book, push the needle through the middle hole and pull the string through just enough to leave a two or three-inch tail.
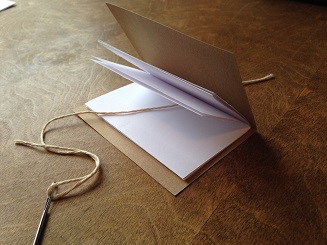
13) Push the needle through the topmost hole and pull so the string is snug. The needle should be on the outside of the book now.
14) Push the needle through the bottom-most hole (skipping the middle hole entirely) and pull so the string is snug. The needle should be on the inside of the book now.

15) Push the needle through the middle hole again. You will need to gently make room, as the string has already gone through this hole once. Pull the string so it’s snug.
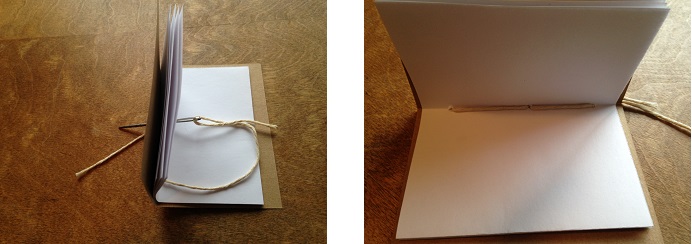
16) Remove the needle. Tie your string in a double-knot close to the spine of the book. From here, you can trim the ends or tie it in a bow.
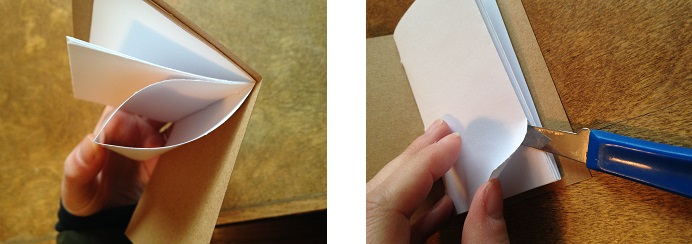
17) Some of your pages will still be folded together. Use your scissors or cutting blade to carefully separate them. Go slowly so the cuts are clean.
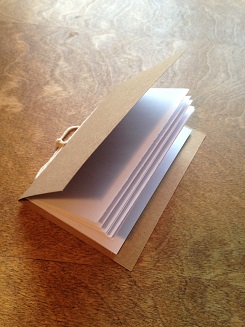
You’re done! You can decorate your book, or just start writing, drawing, doodling, or sketching!